
The Kit:
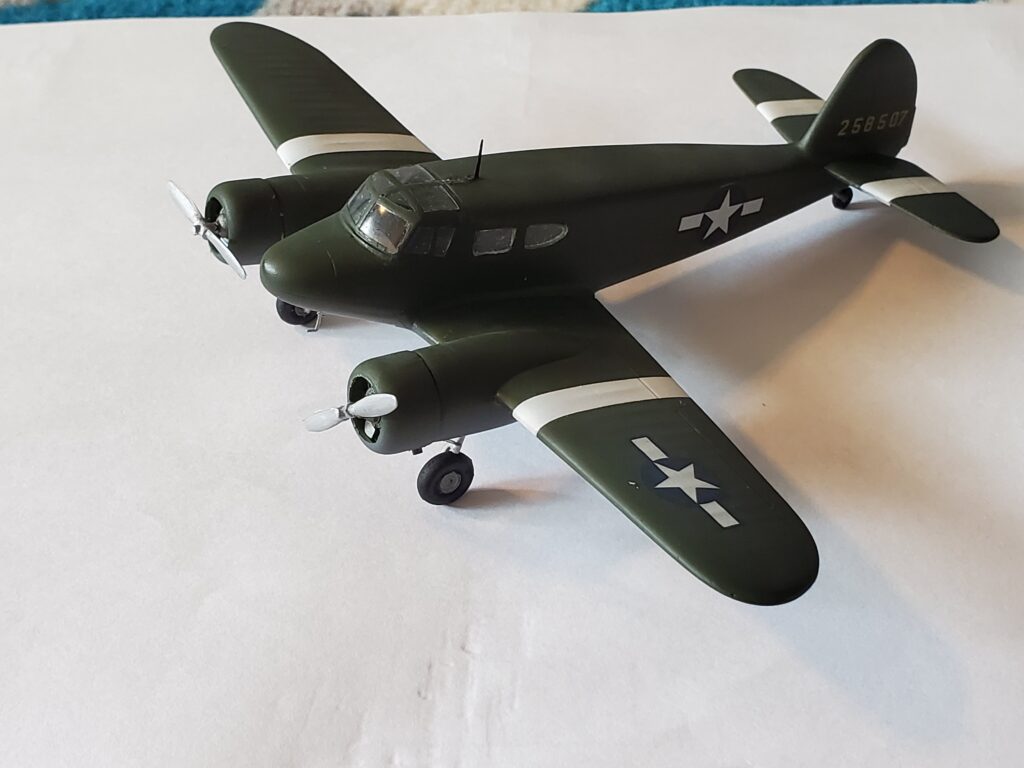
1/72 Pavla Cessna T-50 Bobcat “Bamboo Bomber”

Planning:
In September 2019 I moved into my own apartment after a decade plus of renting rooms and living with roommates, it was the first time I’d had any space for modeling in years and I decided to dedicate a small corner of my living room to setting up a space for my long dormant hobby. The space has evolved over the past couple years into something I’m actually really proud of, look at the main “Models” page for how it currently sits!
This turned out to be a very good idea as we all know what happened a scant six months later. In late 2019 all of my stuff, which had been in storage, got delivered to my new apartment and in going through it I was reunited with my stash. I don’t know why this kit jumped out at me as the one to come back on, on paper it’s not a very good choice. It has resin engines and a sheet of photo etch, which I really didn’t do a very good job with, but “The heart wants what it wants,” and I hearted a Bamboo Bomber!
One of the last kits I tried to build before I moved from my last house that had space was a P-51D which I was finishing in the modern day restoration of a P-51D I had seen at Reno, “Speedball Alice,” and I never finished it then. That kit had been destroyed in storage. I had a Tamiya P-51C kit and I really wanted to summit that mountain, so I decided to finish this kit in the general paint scheme I would use for that one as practice. The premise is that this Bamboo Bomber would be a “squadron hack,” which is an airplane assigned to a squadron which would use for general tasks like ferrying staff around and running errands. This tail number did serve in the ETO as a squadron hack but not for this squadron, but for my first time back I wasn’t too worried about accuracy!
Building:
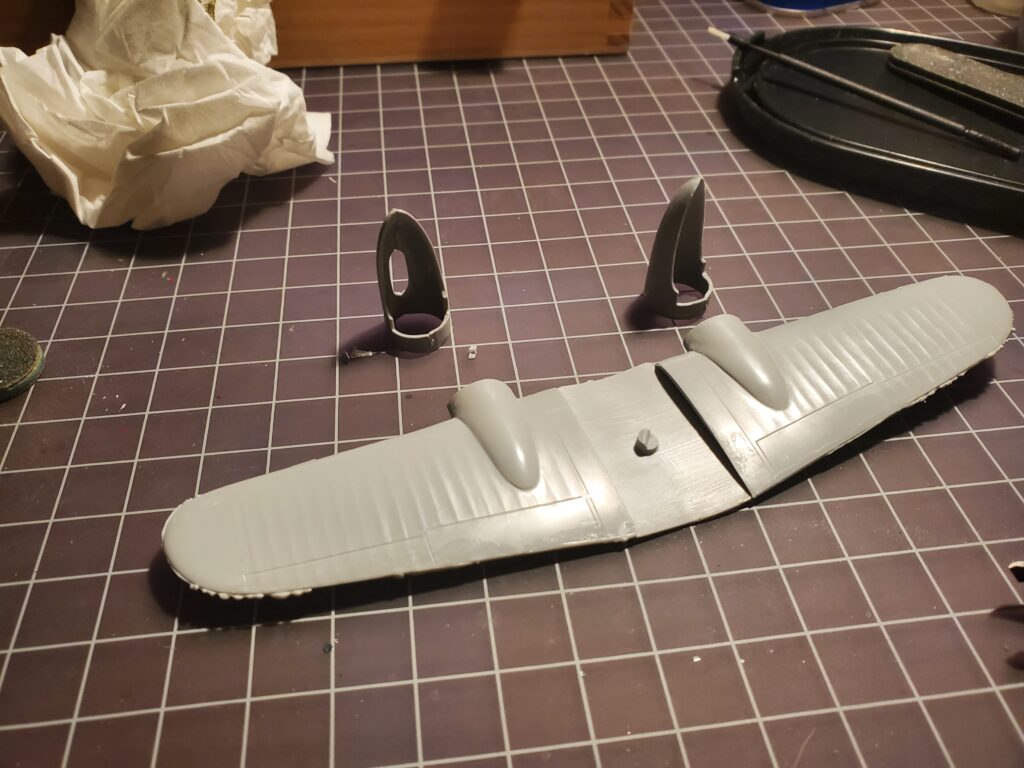
I started in with the wing assembly and Nacelles, things fit together okay but I used a bit too much cement resulting in a lot of plastic bead around the edges, good for seam filling but it required a lot of sanding to fix. In the before times I used to use Tenax 7R cement and it turns out that stuff isn’t available anywhere anymore but is now called “Styrene Tack-It II” So I ordered a bunch of that, but later I found Tamiya Extra-Thin which is all the rage these days, so I still have a bunch of this stuff lying around, it does do well for certain things!
The nacelles actually fit fairly well but a little bit of styrene added and sanding to close large gaps and they were acceptable. The kit is supplied with photo-etch firewalls for the engines, which are resin, and I used CA glue to attach those. I felt they fit okay, just not really sure why! Once everything was together I cleaned up seams and finish sanded the wing assembly.

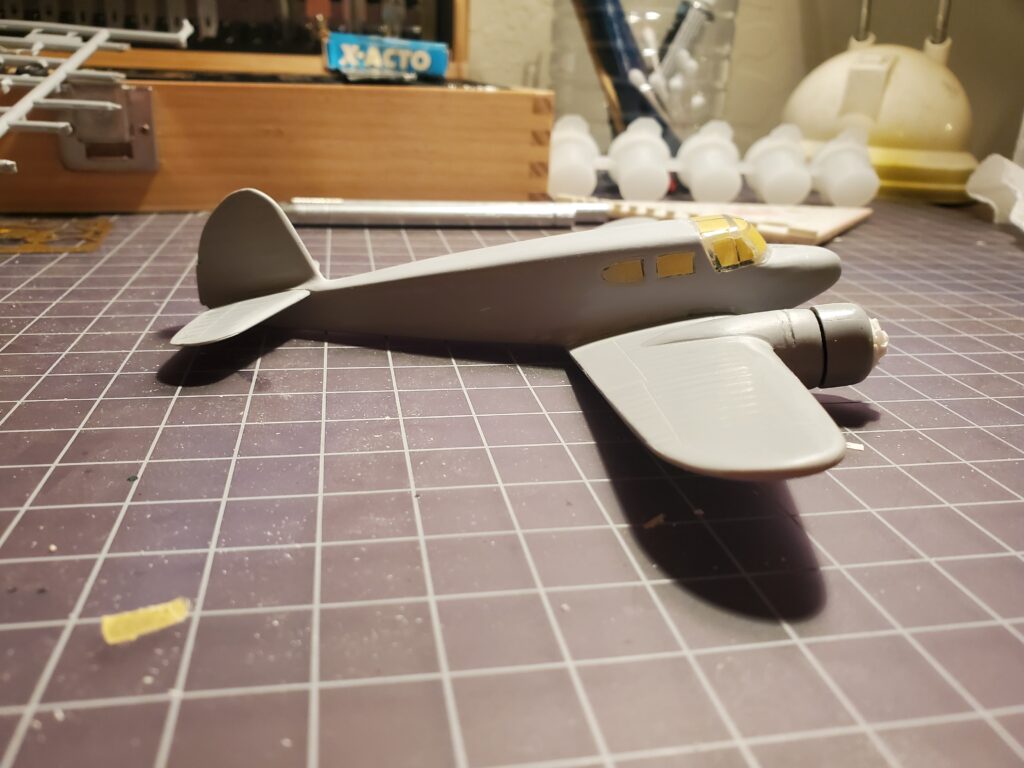
The fuselage interior is really basic and honestly, you’ll never see it anyway so I gave it a basic paint job and called it good. The clear parts in this kit were vaccuum formed and I cut the side windows out as carefully as I could and glued them in with the Styrene Tack-It II. They fit fairly well actually!
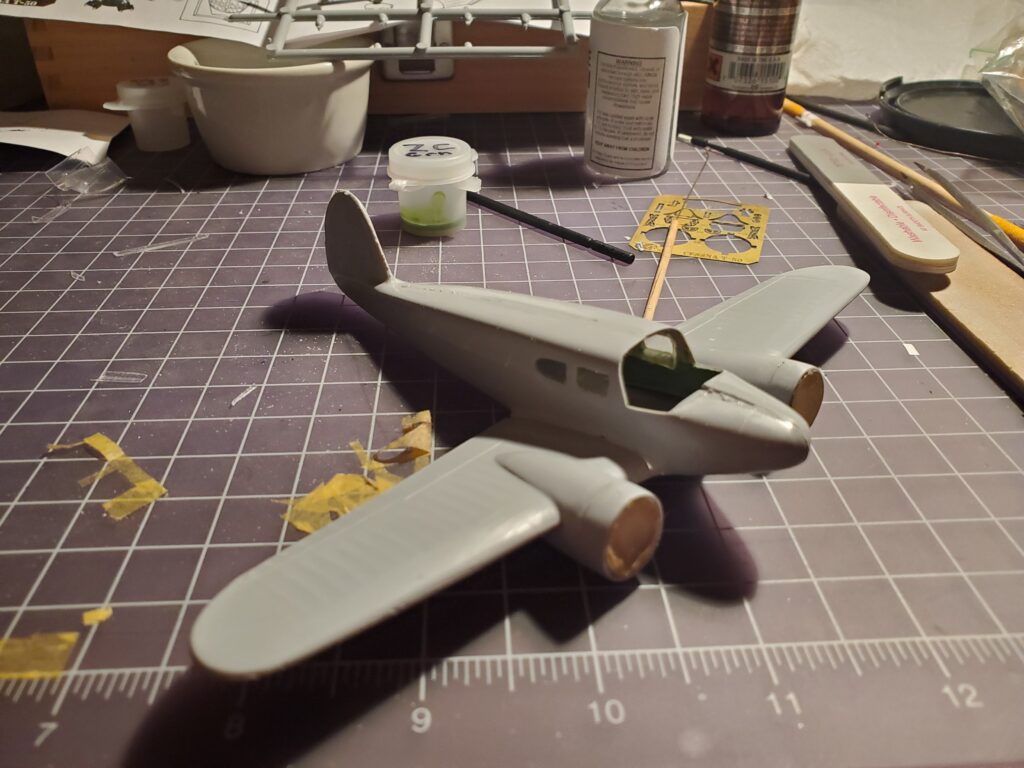
The fuselage halves did not fit very well, as you can see. I could have done a lot better job of aligning them and a lot of sanding was required later which would not have been necessary otherwise. The fuselage assembly actually fit to the wings very well and very little fixing of the joints was necessary.
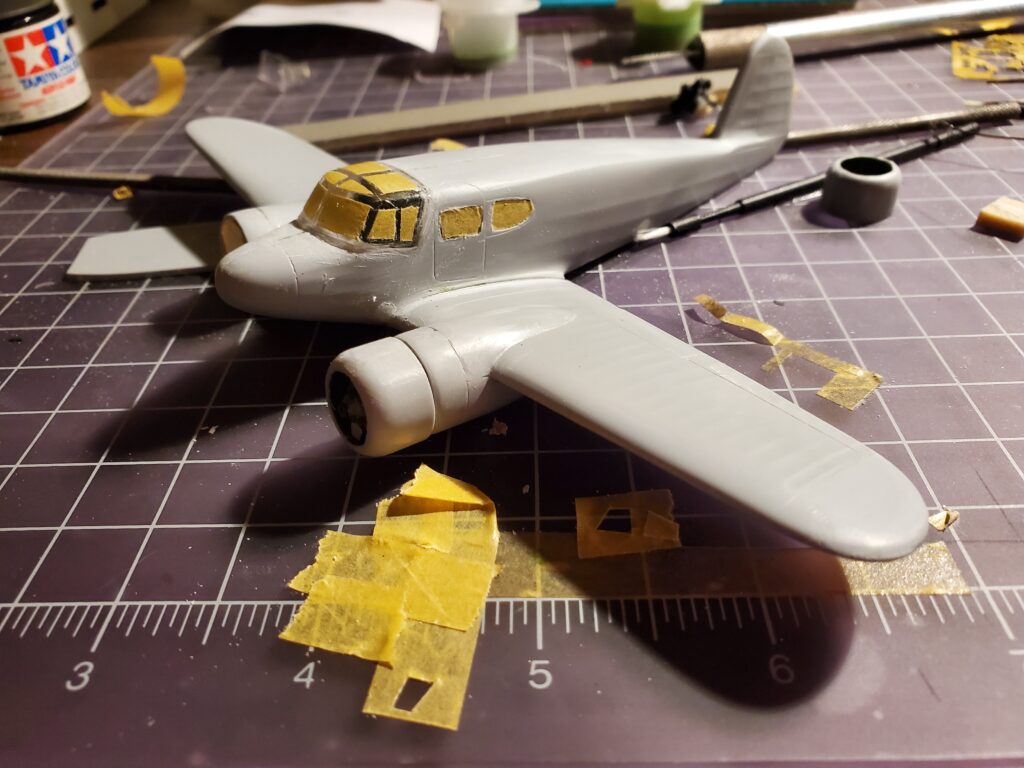
The “canopy” was another vacuum formed part which was difficult to get cut out perfectly and at the end of the day I ended up with a step at the bottom of the canopy, I’ve since done a couple more vacuum formed parts and I have gotten better at it! At the end of the day I got it masked and attached and filled the gaps okay enough to move on! I realized at this point that I had made a huge mistake and not painted the instrument panel glareshield, which reamains bare grey plastic to this day!

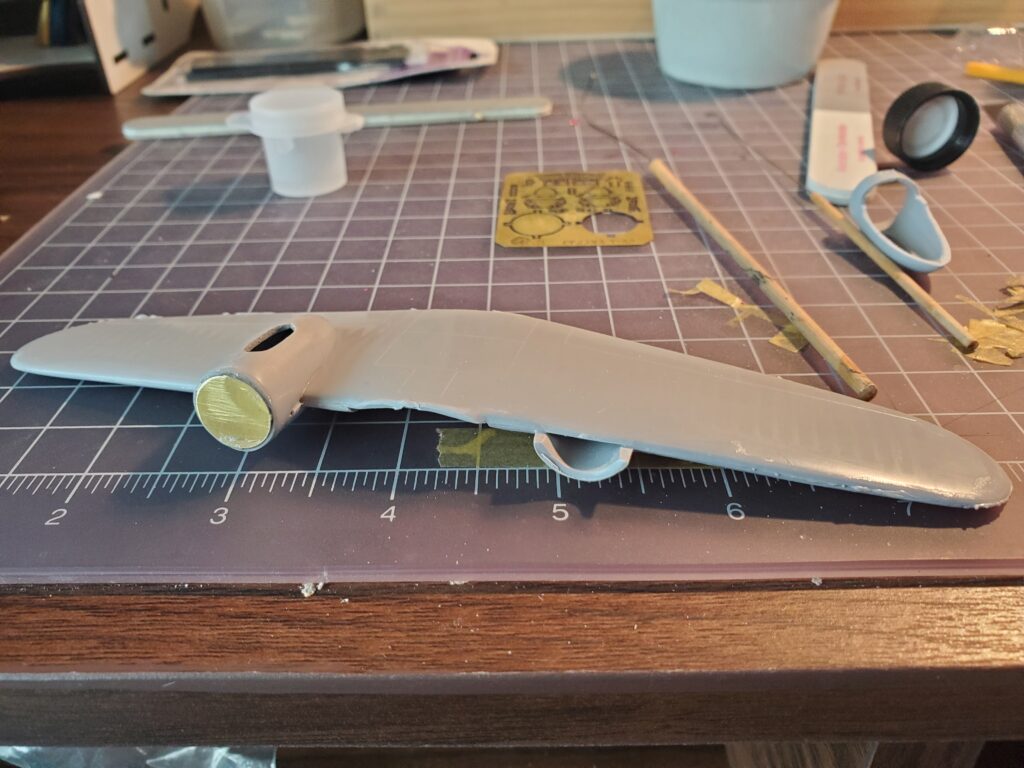
At this point I painted the little resin Jacobs Engines, called “Shaky Jakes” by the people who love them, using the Tamiya paints I had around as I had not bought very much new stuff yet, flat black, dark grey, and dry brushed aluminum, once those were installed in the cowls with CA glue I carefully sanded the “stubs” on the back of the engine until the cowl stood off from the nacelle at an acceptable distance and relatively straight and glued those to the brass photo etch firewalls, again using CA. Insides of the cowls painted with Vallejo Model Air zinc chromate green. I probably wont be using it much though, it was very temperamental in the airbrush.
Next I worked on seams. I used CA Glue for seams on this one but since then I don’t use it anymore. It dries very hard and is very difficult to sand without taking off plastic you don’t want.
Finally I glued the tailplanes on, taking care to align them as best I could, worked on some final seams on the underside of the fuselage and the wing join, which turned out mostly okay and let everything dry. I stuffed tissue into the engine openings and it was time to paint!
Painting:
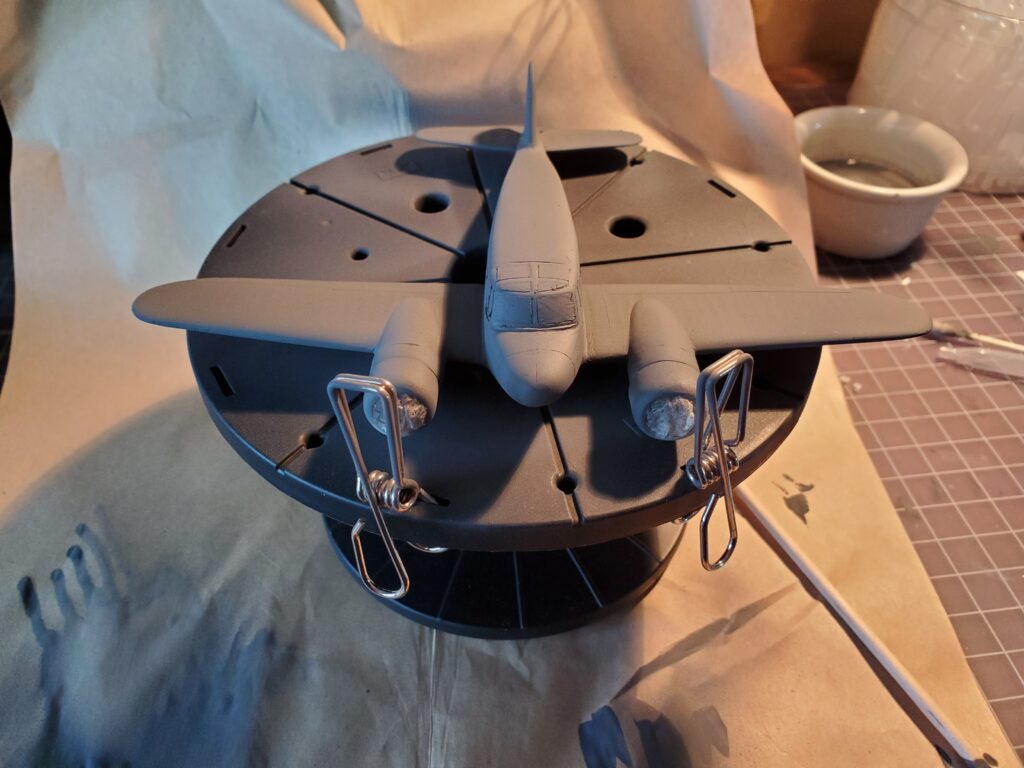

Around the time it was time to paint I dragged my air compressor and airbrush out of the crates they were in in the garage and set them up. My airbrush at the time was an ancient Paasche VL, which is a very easy to use, economical, and reliable double-action airbrush for a beginner looking to get into airbrush painting. Paasche still sells the VL to this day! I added and inline moisture trap which is meant to attach to the air hose as close to the airbrush as you dare.
My air compressor is an Aztek AC-500 airbrush compressor. I purchased this compressor years ago because I wanted one that was full featured and reliable. It hasn’t disappointed! It included an air tank, automatic shutoff of the air compressor, and a pressure regulator and pressure gauge. I have since added a more accurate pressure gauge, better rubber feet, and a moisture trap at the compressor.
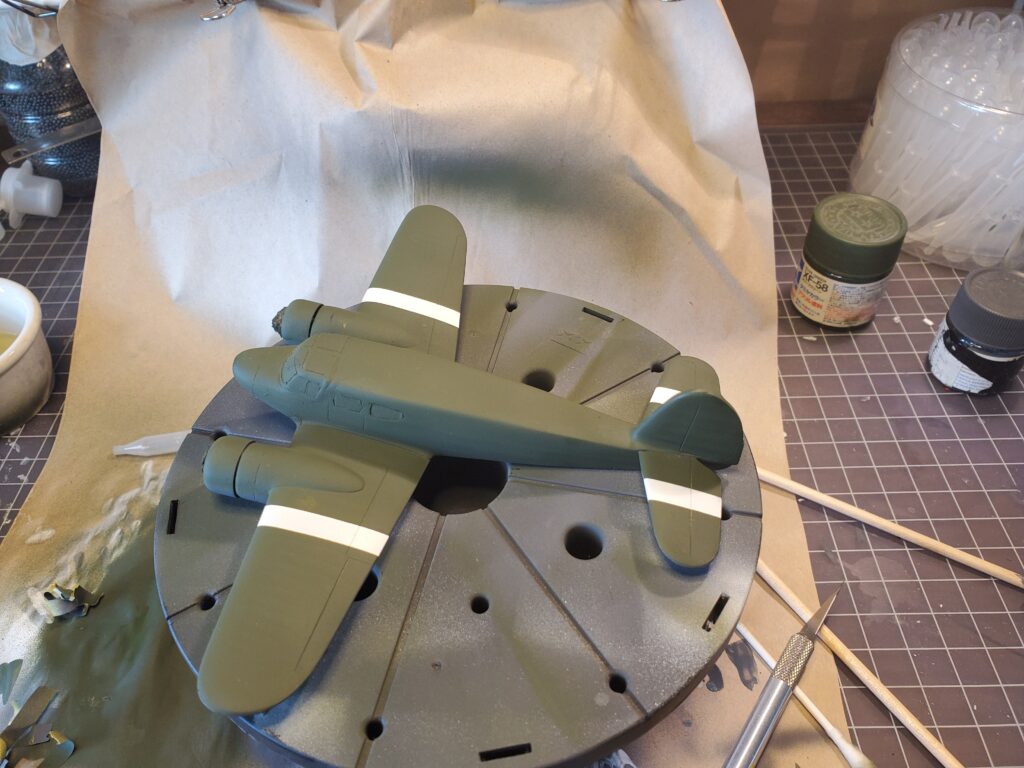
Because the belly is painted grey on this scheme I used Tamiya XF-24 Dark Grey as an overall primer coat, I found a couple more seam issues and fixed those and then painted white patches where the stripes would go. After that I masked the stripes and painted the bottom in another coat of grey and then sprayed the top in XF-58 Olive Green, a couple touch ups of overspray on the grey and I was relatively happy with it!
The last bit before clear coating and decals was to peel the masking off the stripes and I was pleasantly surprised to find that there were crisp lines with no bleed under or overspray!

Decaling and Finish Work:
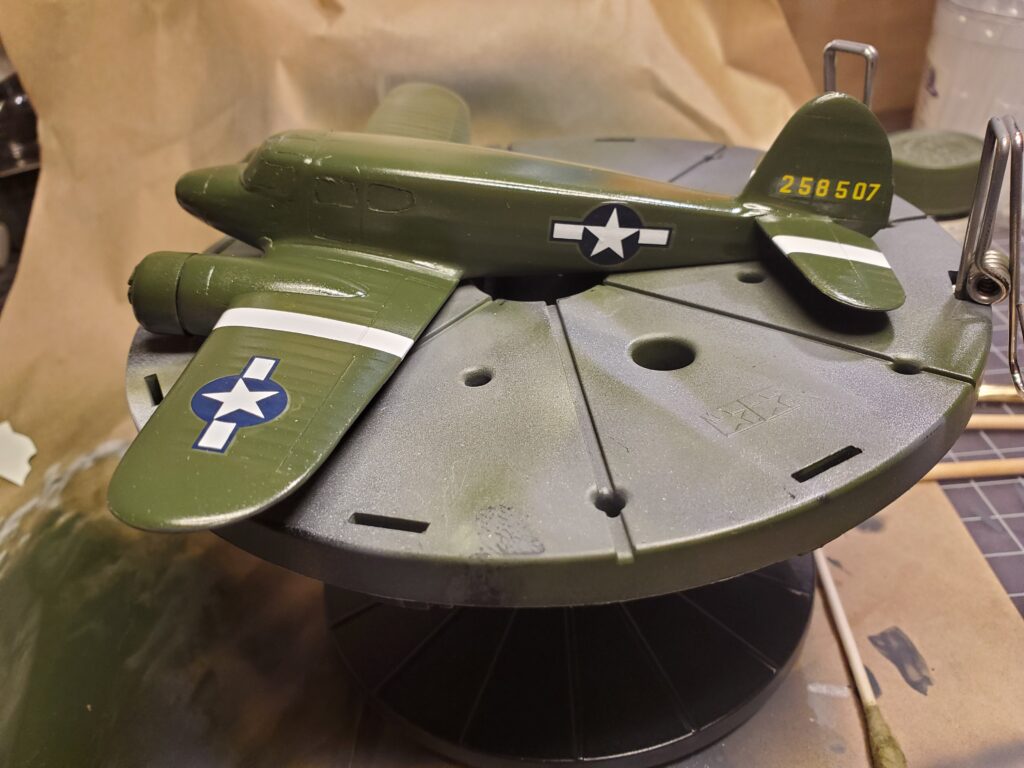
Since the model was painted in flat colors the first thing I do before decals is give it a gloss coat which, theoretically, prevents “silvering” of the decals after application by giving them a nice smooth base to adhere to. There are those who believe it unnecessary and I would agree that you can probably get away with it in a lot of cases. That said, I gloss clear before my decals and then gloss clear again after them and prior to a final flat clear coat and this gives me very good results, with decals that end up looking “Painted on.”
I used an ancient bottle of Future floor wax for my gloss coats. “Back in the Day” this stuff was all the rage, but it has fallen out of favor for reasons unknown to me. I have since dabbled in other clear coats but I still find them very finicky compared to the Future and, lets be honest, I still have a lot of this stuff lying around.
The decals in this kit were just this side of worn out and I ended up having to use some decals from sheets in my spares box after tearing a couple of them, thankfully I only damaged the generic insignia. The decals were very basic, which was fine with me for a first time back, Insignia and a tail number and that was about it.
Walther’s Solvaset to set the decals and another gloss clear coat to seal them in and then I was ready for a flat coat. I had seen a suggestion to use Tamiya X-21 Flat Base mixed with future for the flat coat but found this method to be unsatisfactory, so I used Vallejo clear flat varnish. It provides an excellent dead flat finish and is very easy to use.

Then it was time for everyone’s favorite part of model building, peeling the masks off the windows! It was at this point that I realized I had never painted the cockpit glareshield! Bummer. Oh well!
All that was left now was the finish work. I’m sad to say I did not get any photos of this stage so you’ll just have to picture it. This kit included landing gear but had absolutely zero location help for them so for the tailwheel I drilled a hole and glued it in after painting, for the main gear I noted that they were entirely too tall so after shortening them I again drilled holes about where I figured they’d be using photos and judgement. Even after shortening them significantly they still ended up far too tall. I added a drag brace out of sprue to fill them out a little bit The main gear legs included photo etch scissor links which were incredibly difficult to do as they were so small, but the result was very nice.
A photo etch antenna and pitot tube were also included, I don’t know how I got those things to stick and in the 2 years since finishing it the pitot tube has disappeared somewhere.
The final boss on this kit was the propellers. They come as separate hubs and blades with zero locating help yet again, I carefully drilled the hubs and used brass rod in the blades to locate them and then painted them Tamya Aluminum. Since finishing I have gone back with a Molotow Chrome marker and made the blades quite shiny indeed!
Final Thoughts:
For a first kit back after years off it was a terrible choice, or at least an ambitious one! That said, it generally went together okay and really it kept my interest long enough to get it across the finish line! There were several new things in this one I’d never done before, namely Resin, Photo Etch, and vacuum formed canopy. All in all, it only vaguely looks like a Bamboo Bomber, but at the end of the day it’s on the shelf and looking good. Following this kit I started out on a Tamiya P-51B – “Speedball Alice” as it’s been one of my holy grail paint schemes for a long time! I do enjoy this hobby, every frustrating, terrifying, and fiddly minute of it!
Thanks For Your Time!